Pages

Showing posts with label machine knitting. Show all posts

Friday, 3 February 2017

Machine Knit: new discoveries: meeting and rejuvenating mechanical machines: Singer Silver Reed 321 360

Oh how I do love learning new things!
One of the factors inherent in a craft that requires machines made around 40 years ago, is that they will require maintenance.
I adore my Singer 321, the model came out in 1972 and I believe they are so numerous in Australia as they were sold with Singer sewing machines. My mum remembers her very talented crafting aunt creating many garments on her knitting machine back in their heyday.

I have made many a swatch on my trusty Singer 321, it's a lot like hand knitting for me, I simply enjoy the process of making. A finished object is nice, however it's the formation of stitches, discovering what can be done and discovering new techniques, that give me great enjoyment.

My next search was for a ribber, to double the size of my 200 metal stitch bed and allow me to venture into the world of circular knitting and ribbing. Did anyone say "SOCKS" ;)
Of course, it never rains, but it pours, and after a few months of keeping my ear out, I spotted not one, but two machines with ribbers for the right prices. Of course I investigated them both ....
One was another Singer 321, this one a smidge younger than mine and with a rather fetching red highlights.
The other was my 'dare to hope for' machine, a Singer 360.
She's plainer than her older cousin, having been released as the last fully mechanical model in 1980 before electronic machines came out around 1982.
Both machines had spent quite a number of years sitting in garages, so they were in falling apart cardboard boxes, grimy, stiff and not looking their best.
My 360 even had the main carriage stuck to the main bed with a deteriorated piece of plastic and none of it's cams' rotated.

Did I mention my love for learning new things? I also adore cleaning - not tidying!, but removing grot and getting stuck things spinning again.

Armed with the internet, paper towel, cloths, a stiff paintbrush (or two), a bottle of methylated spirits and white spirit, some 3 in 1 oil, a set of screwdrivers and a healthy dose of enthusiasm,
I set to work.

SPOILER ALERT - Yes, they both are restored and knit, tuck and slip beautifully. The 360 looks like living up to it's name to knit through 360 degrees, as it's ribbing is perfect.
The 321 is now named Susie and has found a very happy home with Sew Jillian
Photo heavy details now follow.
Doesn't look too bad - but those cams didn't budge!
The flat sponge bar and the edge pieces that were sticking the carriage to the main bed
First thing that everyone will mention is the sponge bar.
These long metal strips are meant to have a strip of foam on them that will press the needles down into the bed and allow them to hold their position. Without a sponge bar, they flop around and when in D position, they can dislodge and fall out. Sponge bars deteriorate over time, more rapidly when they've been in storage (or so I've heard), so in short, every machine that's not been used for a while will need a new one.
A new functional spongebar in my 321
aka what it 'should' look like
You can see the piece that looks like a long narrow strip of cardboard in the photo of my 360 above? That's a flat sponge bar. Under the fabric layer was a mess of sticky gunk that crumbled and required a screwdriver to scrape out and goof off to completely remove.
Obtaining a replacement sponge bar is, interesting. There are suppliers, however many of them would rather not ship to Australia (and postage isn't cheap for a 120cm long piece of metal). Fortunately both sponge bars had intact metal, although the 321's plastic end caps have deteriorated and will need replacing.

The most common DIY replacement available is weatherstripping. I took the advice of experienced machine knitters and purchased the Raven brand RP14B extra thick 12mmx12mm self adhesive version. One packet was enough to do both sponge bars.
The ribber has an original plastic (not sponge) bar, however the 360's is unstable in D position, so it may need one of these in the future.

There are tutorials online for inserting the weather strip sponge. I then used iron on interfacing to provide the fabric topper which protects the sponge.
I did try glue and ribbon first, but that was messy and I might still have some glue on some needles (don't ask...)
Ta da!!
pretty good for a first go. Weather strip, interfacing and tape
Reinserting the sponge bar is quite straight forward, providing you don't try to put it in upside down.... The sponge goes down and the metal goes up.
Hold the needles down on the main bed as you slide the bar back into it's hole, you can see the orange tip in the main bed as it approaches the raised needles at 6.5.
While the sponge bar was out of the machine, I removed all of the needles from the main bed and soaked them in methylated spirits. I soaked the needles from the centre separately from the two ends. this enabled me to replace the end needles in the centre and vice versa. I was fortunate in that only a few needles overall were bent and required replacing.

Needles, the bottom 2 have soaked in metho while I wrestled with the carriage
Now, armed with copies of each machine's manual, it was time to get to work on the carriages...
Manuals can be found as free downloads on this amazing site: Machine knitting etc dot com
Seriously, it's brilliant!

Both (all) Singer/Silver Reed Japanese metal bed mechanical machines are essentially the same.
Step one, remove the handle from the main carriage, it will be held on with screws in the side. Keep them together ;)
Then remove the stitch selection dial. It will have a little clip holding it in place, this is important for when you need to clip it back in at the end. I found holding it under tension with a screwdriver when I reinserted the metal selector was necessary.
321 with cover dismantled. The grey plastic also comes off
360 with handle removed
360 showing spring clip
Now you can see the cams that are vital to the machine's function. Don't attempt to remove them, and most definitely don't attempt to dismantle them.
(unless you know what you're doing, in which case, you're already familiar with this bit!)
321 ready to clean
Look at the yellow gunk, this is old oil that we're about to remove with white spirit.
If you spot any fluff or thread, remove it.
360 ready to clean
I painted everything liberally with white spirit on a stiff paintbrush.
Well, all the metal bits anyway. It took less time than I thought before the cams began to start to budge, then more working the spirit into the mechanisms and attempting to spin the cams, until they spun freely, quite quickly and without resistance, yay!!

I wiped off whatever excess I could see and did a little happy dance.
Next I re-oiled anything that moved, white spirit is amazing, but very, very drying and if they're not re-oiled, the cams will seize again.
Now its simply a matter of reversing the steps and putting all of the pairs of screws back into the holes from whence they came.

And voila! All it needs is the regular maintenance steps as outlined in the manual. Vacuum or squirt air +/- a brush along the main bed to remove any dust and fluff, oil the main bed and set up to knit some test swatches!
Job done!

SaveSave

Saturday, 31 December 2016

2016: Exhibitions: WARM and The Royal Melbourne Show

Some of these landscape squares were knit by me! 1000 pieces, 250 Victorian hand knitters
SEAM's WARM community knitting project
Hasn't time flown!
I've got a few things I'll share here so I remember what I did for next time, and some lovely things I've been part of that deserve to be remembered in this space.

I've continued to dabble in machine knitting, and emboldened by my Dairing 2/3/Four, I made the matching Two/3/4 top, a sideways knitted tank in the same thin cotton/stainless steel/silk mix, with neck, arm and hem edges left to roll. 

I took my time joining the side seams by hand, and thoroughly enjoyed the process. I had difficulties with keeping my cast on edges loose, so I joined them to each other and the result is a modern asymmetrical top that I adore. I entered it into my local show, The Royal Melbourne and was rather chuffed to receive a third place against some rather talented, and very experienced competition - definite beginners luck!


No luck was involved in Mr MaciNic's results, he's a very talented artist over several mediums and was placed for some lovely woodworking and took the blue ribbon in the rather obscure printing technique, Intalagio.

The Blyde River Butts image was taken by the equally talented Jenny Rennous_oh_Glennus in Africa and then printed:

Intaglio is a rather time-consuming technique using an etching press and plates.

In detail, it involves converting an image to digital and then using photopolymer plates. These have the image inkjet printed directly onto the plate and exposed to uv light. The plates are then washed with water to remove unhardened polymer, Inked and wiped, same as traditional Intaglio, and passed through an A3 sized benchtop press onto dampened cotton rag paper. 

In September he wanted to try copper drypoint next, and he has. I have some rather fetching octopi etchings, hand coloured with watercolours, and a study of our somnolent dachshund.

I was also fabulously fortunate to stumble across the WARM project, a community knitting project where Victorian hand knitters were asked to knit from designs, specific to the project, designed in Victoria by Georgie of Tikki. I contributed several pieces. A large scale image of a rejuvenated open cut mine was then created to open conversation on renewable energy and the environment. Why? Because we've forgotten how to warm ourselves with wool.
It was rather lovely to see the installation at the Art Gallery of Ballarat and to be able to take my grandma. She's an amazing crafter who is still knitting and crocheting for charity, at 93.

It's currently touring, and I believe it has just left the Ararat Art Gallery after spending time at the Geelong Wool Museum. Details can be found on the SEAM page.

Sunday, 19 June 2016

Dairing at the Dressmakers Do

2016 Dressmakers Do : Party time in Melbourne town
Lace LBD
Machine knit Dairing 2/3/Four
Listening to the fabric : felted grey wool jacket
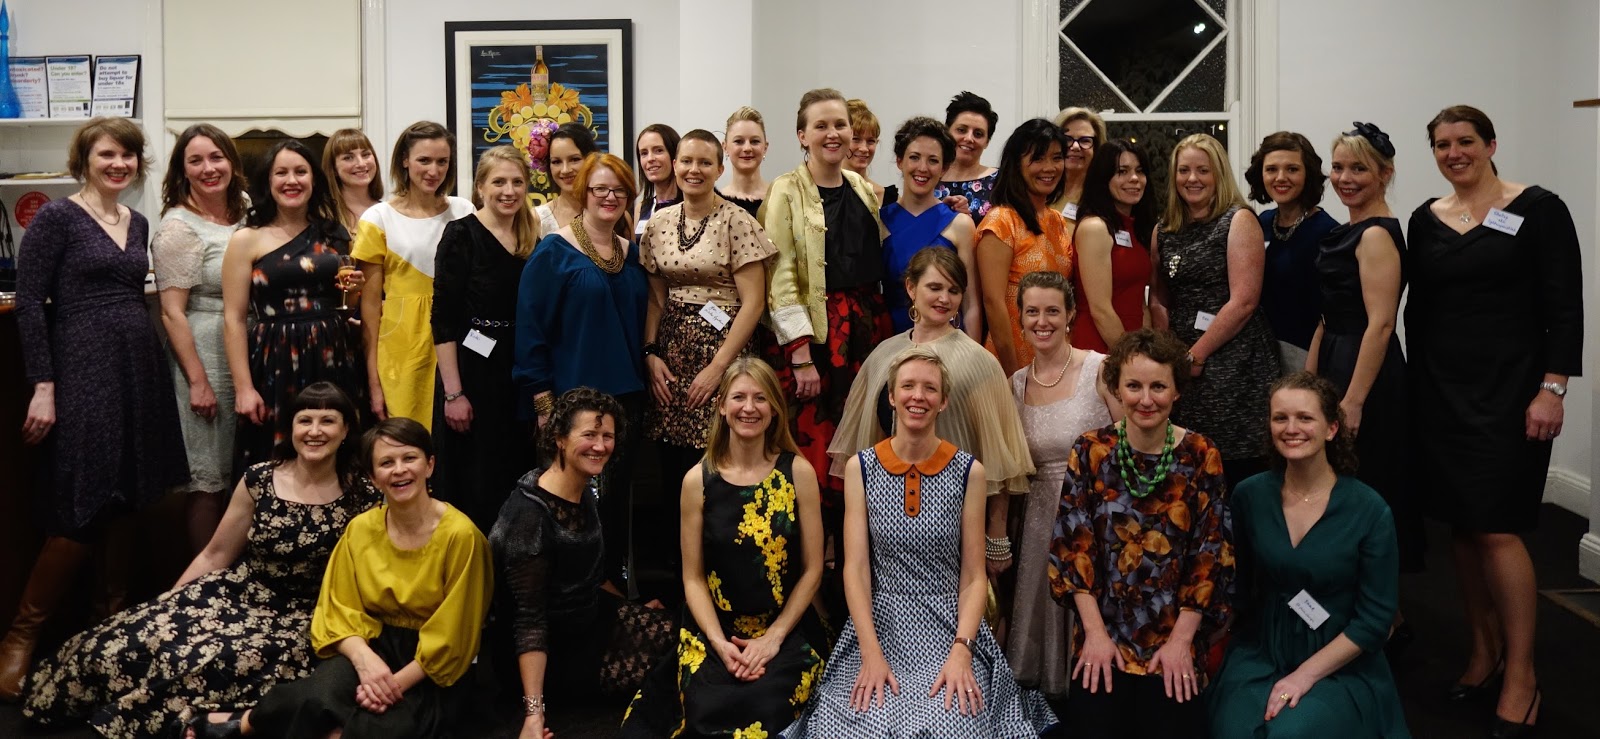
Another occasion to frock up and celebrate all things made by hand with some very talented sewists, this time at the #DressmakersDo organised by the lovely Nichola of the Handmaker's Factory and Leisl of Jorth.
I went for a textural, black and grey outfit; three separates that I know will get plenty of wear in my Melbourne wardrobe.
First up is my classic black lace sheath dress - some may recall that I made and wore this to the very first Frocktails in 2013. Yes, it's the same lace dress, and I still adore it. It has it's very own blog post here: Everyone needs an LBD 09/2013
still haunted by that flash, but what a delightful introduction it was to some lovely and talented sewing friends!
To add some warmth for my travels, I made a grey coat with the most fabulous felted wool - it will have it's own post soon.
For some interest, I thought an avant-garde top knitted in stainless steel, silk and cotton might be just the thing.
Meet Theresa Dair's Dairing top 2/3/Four.
As an overlay (also great with a black tank)
I really like Teresa Dair's design aesthetic. Textural pieces, often knitted with non-traditional threads, in non-traditional gauges, which can be worn in a multitude of ways. It's very similar to my favourite Japanese pattern designers and when made in shades of black, perfectly me ;)
And from the back in its shawl cardigan view:


Crafting friends really are the best.

I found the Dairing 2/3/Four kit in a Raveller's destash, mentioned on Instagram that I was contemplating dabbling in machine knitting to make it and received the most generous offer of a loan of a knitting machine. (thank you again x)
gratuitous dachshund shot. Yes, he 'helped'...
The hand knitters guild market gave me an opportunity to observe and meet some machine knitters, as well as to meet the talented Teresa Dair herself and get some hints on converting the pattern to being machine knit.
The machine knitters guild (MKAV) in the form of the lovely Christine encouraged and guided me through the skills required and I set to work.
For anyone who, like me, has never dabbled before, it's both as easy, and much more time consuming than I had imagined. The actual processing of each row is very quick. The set up, double e-wrap cast on, troubleshooting and eventual cast off was a steep learning curve.
My swatch - used to determine the amount of stitches to cast on, and how many rows to knit.
I underestimated my sleeve length.
The machine is not unlike my overlocker - adorable when behaving but a bugger to rethread and troubleshoot - I don't 'know' it intimately enough yet, so troubleshooting has been a lot of retracing of my steps and cursing.
After 187 rows, the 2nd sleeve was done! So was the cone of thread....
I then used my sewing machine to attach the 4 pieces (Four pieces is a direct reflection of it's name 2/3/Four. I also have Two/3/4 in the same yarn/threads).
I finished it and wasn't sure if I liked it.

I then had to unpick the left sleeve, you may see it's tight in the photo. This was painful.  It was necessary as my 'loose' cast off was still far too tight, exacerbated by the fact that I'd inserted it upside down. I couldn't move my left arm. The cuff on the left now stretches out horribly after 10min of wear, despite blocking ;( I might add a flared cuff extension to both arms, maybe...
new friends and old ;)
Updated newsflash: I do like it ;) It's missing in most of my DressmakersDo photographs as the venue was warm, and as lightweight as it is, the silk & stainless steel is warm as well. What struck me by surprise is how very soft the fabric is! I really was anticipating it being more sculptural, however it's a delightful soft top.
Project page on Ravelry is here

Photowall props for the Win!