I made shoes! Ok, Sandals! I made Sandals!!
And best of all, they weren't difficult ;)
I love leather shoes and sandals, I really do. Jenny is my main enabler, she does have excellent taste. Sometimes though, I can't buy all the shoes, or they've got straps that don't fit in the right spot, or the leather is pleather, or simply not comfortable.
Inspired by the gorgeous work of
Handmade by Carolyn and
Jodie of Scared Stitchless, I've been watching with great interest, this shoe making caper. Then
Jillian introduced me to
Atelier Louise, an Adelaide based designer who has kindly released some sandal patterns, aimed at the complete beginner. I wasn't interested in the
Silver Sands as I've worn the style in India and they're not my cup of tea, however when she released the
Brighton Sandal, it was love at first sight!
The pattern by Atelier Louise is a downloaded .pdf, filled with images, tips and tricks, and there are even more
fabulous tutorials and musings on her blog - it was a one-stop resource for this novice!
I picked up most of my supplies at my local leather shop - Lefflers in Melbourne. They allocated me a lovely young cobbler to point me in the right direction, he was invaluable in navigating the different glues, soleings and leathers available.
 |
| My most loved leather sandals, I rasped off the old textured sole, now ready for the new one |
I practised with the glue and soleing, I resoled my most loved sandals, boots and some kids shoes - yes, it works well! The tutorials suggest cutting the solving larger than the sole and trimming it to size after it's adhered - this worked for me as when I tried applying a 'same size' sole, it didn't go well.
My glue is the highly toxic contact cement version; apply to both surfaces, let it dry and then apply heat, put them together and hammer them - now that was fun! I used both a diabolical little heat gun that threatened to bubble and melt everything it came in contact with, and a trusty old hairdryer. They both worked, so I think I'll stick to the hairdryer as it's not used on my hair. (it tends to be used to dry prints these days)
Next I made cardboard mockups of my sandals. I started with the size 10 and adjusted the slots and strap lengths until I found an arrangement that suits my feet. I do really like the way my heels are hugged by the straps, and the front straps don't rub on my joints.
The blue leather came from a rather fabulous shopping day with Gabrielle and Rosie at The Fabric Store Sydney, a remnant packet contained the perfect amount. Jenny very kindly let me raid her stash for the super soft purple inner leather.
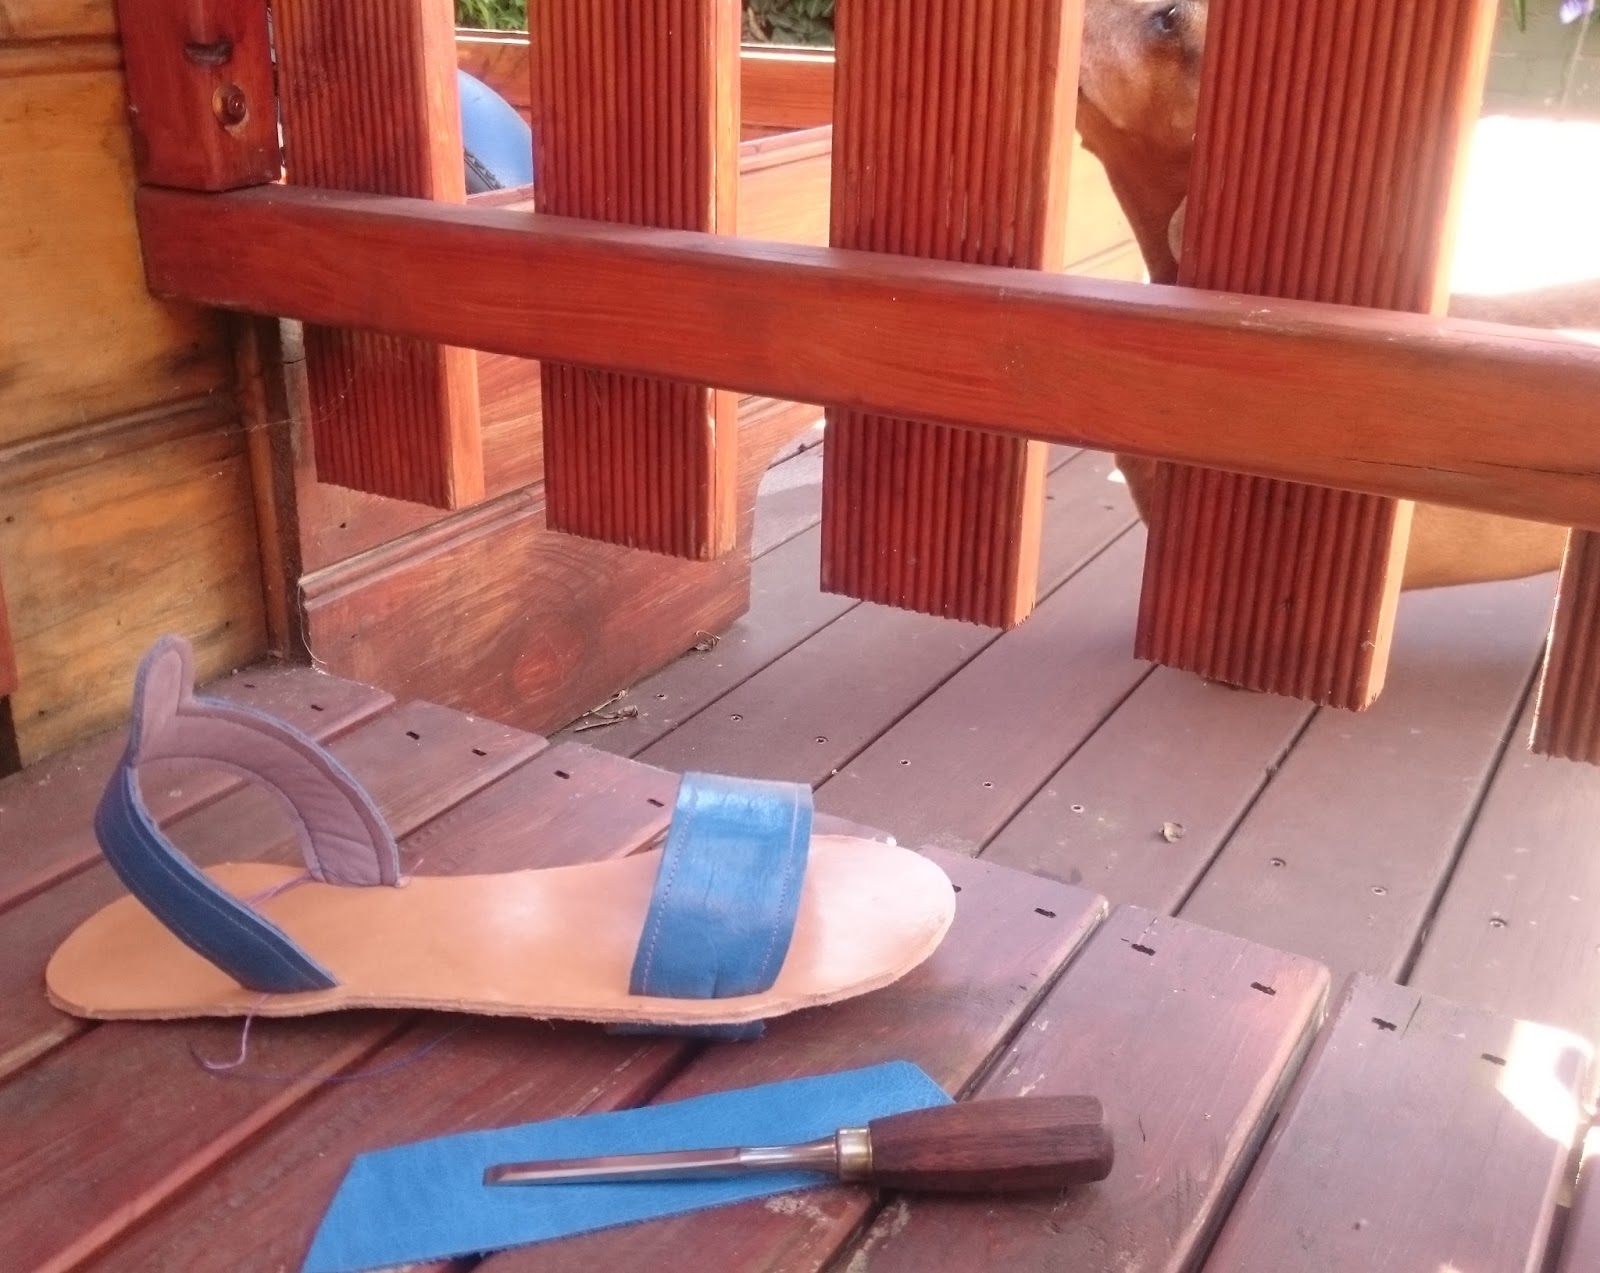
 |
| sneaky Maci shot, the leathers, and the rather lovely woodworking chisel used to pierce the leather sole for the straps |
They are machine stitched together and as my vintage Necchi was having a hissy fit, I used my everyday Singer. I can see where the stitch length varies and it's not perfect, but the machine did handle the 2 layers of soft leather without too much difficulty. I tried both teflon and walking feet.
Trimming the excess sole and soleing could be done by paring them with a Stanley knife, if you are my DH. For me, I choose a safety parer, and everyone breathed a sigh of relief ;)
Lots of beeswax and elbow grease to burnish the edges, I could do more, but I can't see the edges while I'm wearing them ;)
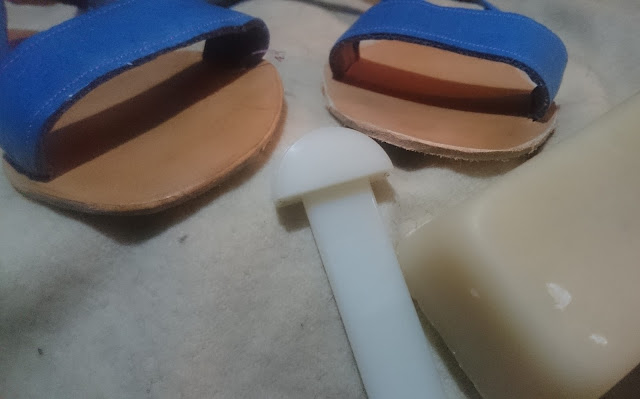 |
| left has been burnished, right is waiting it's turn |
I've actually had these finished since early December! They are designed to have a cute button stud, but mine were a tad heavy for the leather. I wore them with D rings as closures, until I decided to trim off the messy strap ends, which made them too thick to pass through easily - cue headdesk.
The bridle buckle currently securing them is also from Lefflers, I think I'll add another hole for tightness and a keeper strap to tidy the strap end.
I've been wearing them everywhere, just not photographing them!
Next time I'd like to try a single layer of a thicker leather, a lot like my fave RTW pair. And a metallic leather, surely I need a shiny pair!
 |
| And Maci was an excellent assistant ;) |


Awesome colour and beautiful sandals. Well done!
ReplyDeleteJust so fabulous to read about - I've always wondered how you finished the edge of the cut leather, so it's beeswax and lots of effort to make it so? Fascinating. And so awesome that someone is making patterns!!!! Are they fairly simple to adjust to fit? I've got uber wide feet and have resorted to having them specially made because the standard B width in shops wreaks havoc on my EE width feet - eep! I too have been watching Carolyn and Jodie and thinking it's something I should give a whirl.
ReplyDeleteThey're really gorgeous sandals Nic - that shade of blue is really beautiful against your skin colour.
Awesome, well done. Really inspiring.
ReplyDeleteyay! you made a really awesome pair of sandals ... the colour is to die for 😍
ReplyDeleteLeather sandals are a perfect summer choice, combining style and comfort with a timeless look. Durable and breathable, they keep your feet cool while adding a touch of elegance to your warm-weather outfits.
ReplyDeletewomen shoes in Pakistan
This comment has been removed by the author.
ReplyDeleteImpressed by the design and thought behind these Shoe Labels They add both value and identity to the product effortlessly
ReplyDeleteSilver platforms sandals - Thanks for sharing such useful blog.
ReplyDelete